

 TensorFlow tutorials are a great way to start your journey into deep learning. Google developed and manages this premier open-source framework that lets users design, fit, assess, and use deep learning models with minimal code .
You don’t need a complete understanding to begin with TensorFlow . Beginners can learn through ground examples that show simple machine learning tasks using Keras, TensorFlow’s high-level API . These tutorials focus on neural networks—advanced algorithms that identify patterns in data by replicating the human brain’s functionality .
This piece guides newcomers through TensorFlow’s simple fundamentals . You’ll learn to build your first neural network and adjust weights and biases through backpropagation . The knowledge will help you become skilled at working with complex models. Whether you’re new to machine learning or want to expand your skills, this beginner-friendly approach will help you direct your path through neural networks confidently.
Getting Started with TensorFlow
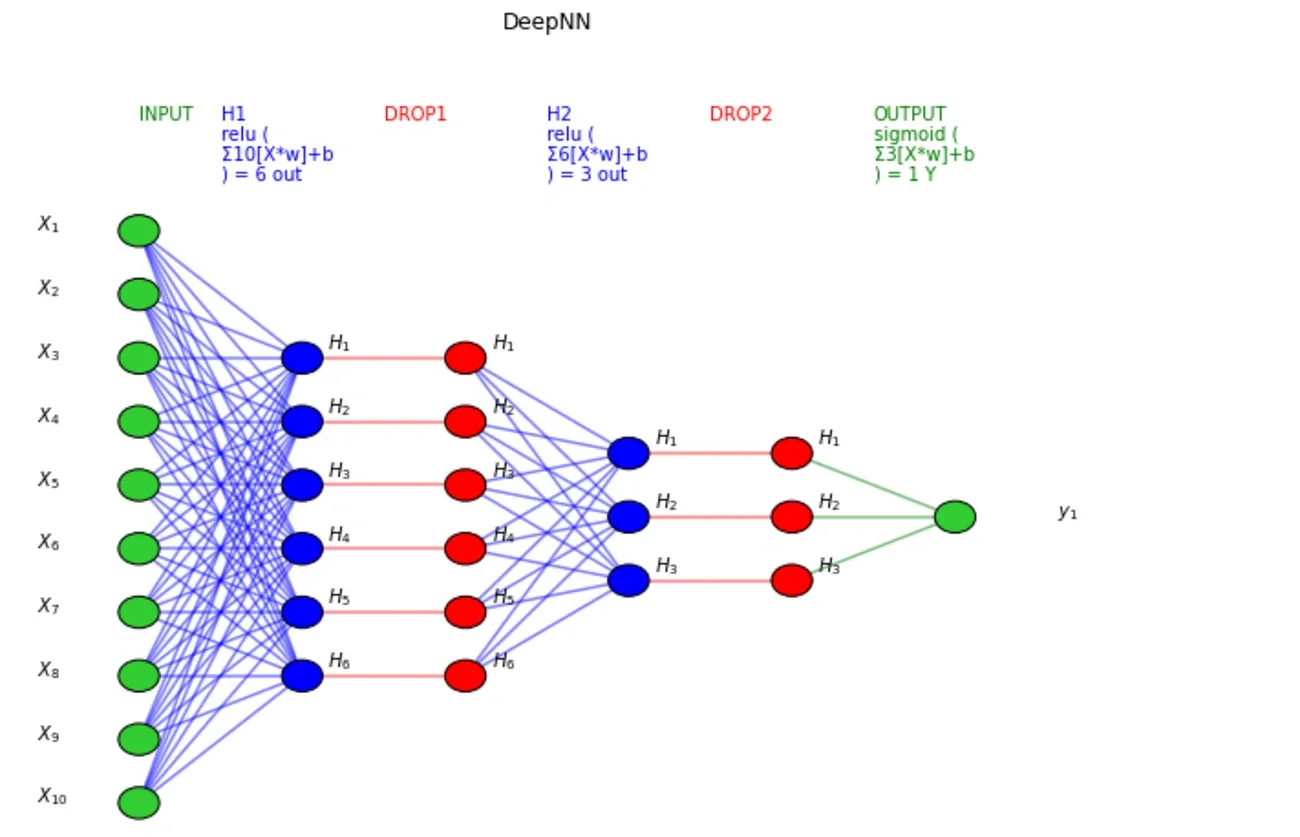
Image Source: Medium
A proper development environment setup plays a significant role in working with neural networks using TensorFlow. Creating an isolated Python environment with venv or conda helps prevent package dependency conflicts [1]. You can create and activate a venv environment using these commands:
python -m venv tf_env
source tf_env/bin/activate  # On Windows: .tf_envScriptsactivate
The next step is to install TensorFlow with:
pip install tensorflow
TensorFlow will automatically employ compatible NVIDIA hardware with the proper drivers installed for GPU support [1]. Windows users might need these additional steps with conda:
conda install -c conda-forge cudatoolkit=11.2 cudnn=8.1.0
pip install "tensorflow<2.11"
More importantly, Keras serves as TensorFlow’s main interface and provides a highly productive API to solve machine learning problems [2]. TensorFlow 2.0 has made Keras its official high-level API, with tf.keras being the recommended implementation [3].
Google Colab is an excellent alternative to local installation as you start your TensorFlow trip. This cloud-based Jupyter notebook environment gives you free GPU resources. You only need a Google account to get started [4].
You can verify your installation by running:
import tensorflow as tf
print(tf.__version__)
Build Your First Neural Network
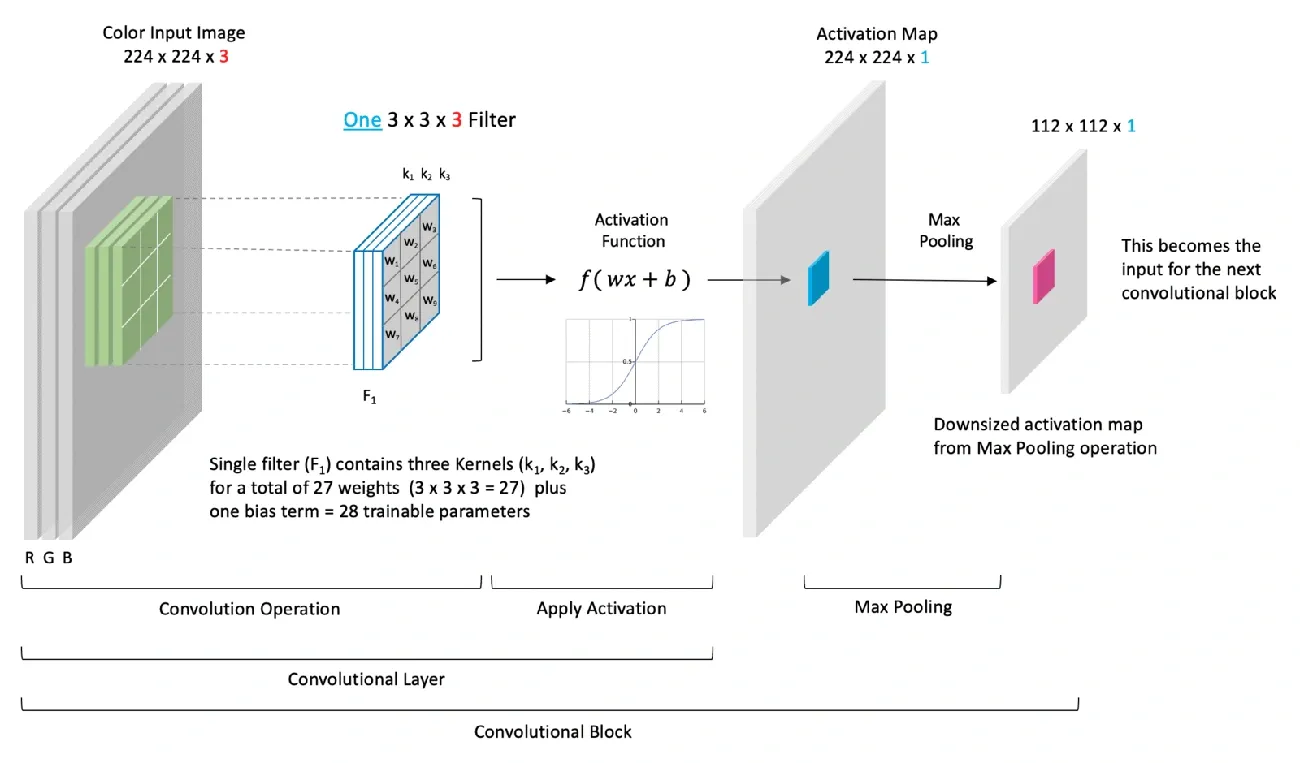
Image Source: LearnOpenCV
Your environment is ready, so let’s take a closer look at building your first neural network with TensorFlow. The MNIST dataset of handwritten digits serves as an excellent starting point to learn neural networks. This dataset helps beginners understand the basics.
The process starts with importing and loading the MNIST dataset:
import tensorflow as tf
mnist = tf.keras.datasets.mnist
(x_train, y_train), (x_test, y_test) = mnist.load_data()
The data needs preprocessing. You can scale the pixel values from 0-255 to 0-1:
x_train, x_test = x_train / 255.0, x_test / 255.0
The next step creates a Sequential model with three layers:
model = tf.keras.models.Sequential([
  tf.keras.layers.Flatten(input_shape=(28, 28)),
  tf.keras.layers.Dense(128, activation='relu'),
  tf.keras.layers.Dropout(0.2),
  tf.keras.layers.Dense(10)
])
The model structure needs compilation with an optimizer, loss function, and metrics:
model.compile(optimizer='adam',
              loss=tf.keras.losses.SparseCategoricalCrossentropy(from_logits=True),
              metrics=['accuracy'])
The model training happens through the fit method:
model.fit(x_train, y_train, epochs=5)
You can measure your model’s performance on the test dataset:
model.evaluate(x_test, y_test, verbose=2)
This dataset helps build confidence because a well-trained model typically achieves around 98% accuracy [5].
Improve and Expand Your Models
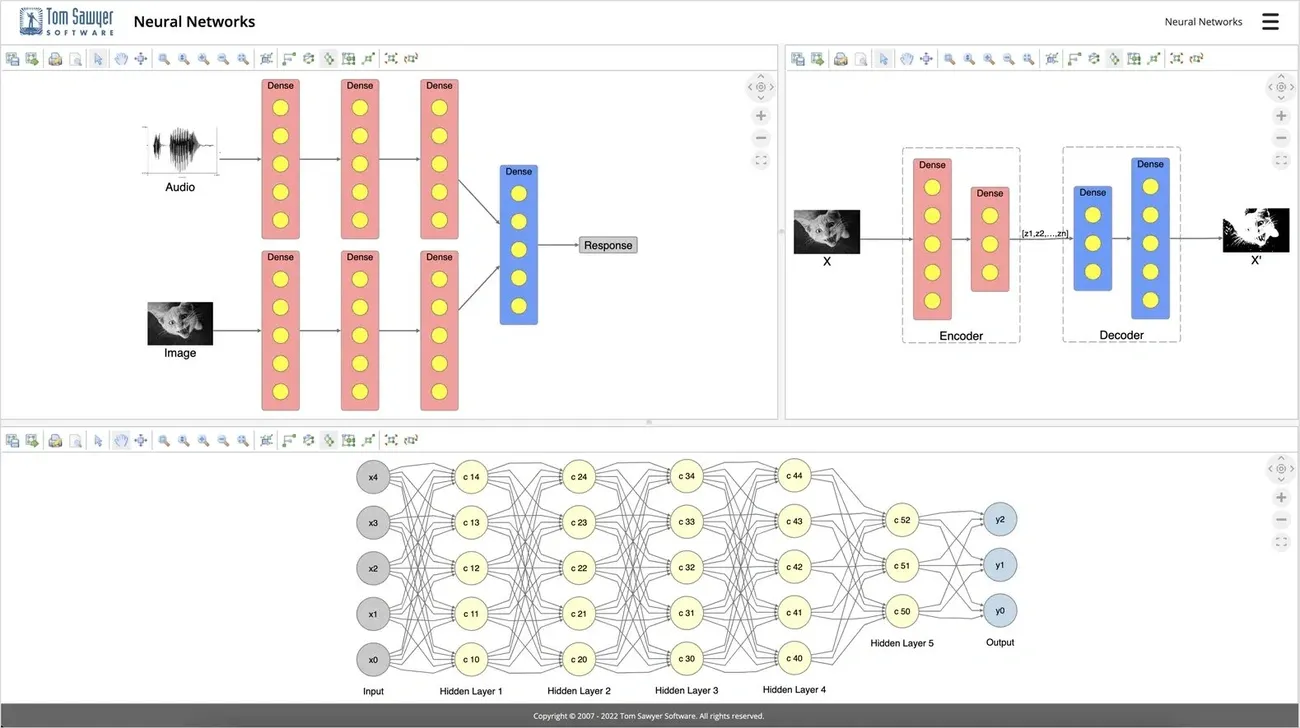
Image Source: Tom Sawyer Software – Blog
You need advanced techniques to improve model performance and expand capabilities once you master the simple concepts of TensorFlow. TensorBoard helps you visualize training progress with up-to-the-minute data analysis. This powerful tool tracks metrics like loss and accuracy and diagnoses problems such as vanishing gradients [6]. Your hyperparameter fine-tuning becomes easier as you see how learning rate and batch size affect performance.
On top of that, regularization techniques help prevent overfitting. BatchNormalization makes training more stable by normalizing layer inputs. This enables faster training with higher learning rates [7]. Dropout takes a different approach by randomly setting some activations to zero during training. This forces the network to learn redundant representations [8]. These techniques can interact in complex ways. The best results usually come from applying BatchNorm before Dropout [8].
Model saving prevents unnecessary retraining. TensorFlow’s multiple formats include the recommended .keras format, SavedModel, and HDF5 [9]. Each format saves your model’s architecture, weights, compilation information, and optimizer state:
model.save("my_model.keras")
reconstructed_model = keras.models.load_model("my_model.keras")
Transfer learning lets you load pretrained weights into a new model architecture [10]. This expands your capabilities beyond simple neural networks and builds on 5-year old foundations.
Conclusion
TensorFlow offers a simple way to start learning neural networks and deep learning. This piece shows you everything from setting up your development environment to building your first neural network with the MNIST dataset. It also explores advanced techniques like TensorBoard visualization, BatchNormalization, and Dropout that improve your model.
Your trip from simple concepts to ground application shows how quickly you can achieve great results. A well-trained model on the MNIST dataset usually reaches around 98% accuracy. This original success builds a strong foundation that helps you tackle complex neural network architectures.
You need consistent practice and experimentation to become skilled at TensorFlow. The learning curve might look steep at first, but this piece breaks down complex concepts into simple steps. You’ll get better results when you focus on hands-on practice with progressive challenges instead of trying to understand everything at once.
These tutorials teach you more than simple neural networks. You can use transfer learning techniques, customize advanced architectures, and create solutions for real-life problems. This piece marks the start of an exciting trip into deep learning with TensorFlow.
Note that neural network development blends science with art. The most successful practitioners mix theoretical knowledge and creative experiments. Start with small projects, build confidence with simple models and expand your skills as you learn more.
Key Takeaways
Master TensorFlow neural networks through hands-on practice, starting with proper setup and progressing to advanced techniques for real-world applications.
• Start with proper environment setup: Install TensorFlow in an isolated Python environment or use Google Colab for free GPU access without local installation hassles.
• Build confidence with MNIST: Create your first neural network using the handwritten digits dataset – achieving 98% accuracy builds momentum for tackling complex projects.
• Prevent overfitting with regularization: Use BatchNormalization and Dropout layers to stabilize training and improve model generalization on unseen data.
• Visualize progress with TensorBoard: Track training metrics in real-time to diagnose issues like vanishing gradients and optimize hyperparameters effectively.
• Save models for reuse: Use the .keras format to preserve architecture, weights, and optimizer state, enabling transfer learning and avoiding costly retraining.
The key to mastering TensorFlow lies in consistent hands-on practice rather than trying to understand everything theoretically first. Start small with basic models, build confidence through successful implementations, and gradually expand to more sophisticated architectures as your understanding deepens.
FAQs
Q1. What is TensorFlow and why is it popular for neural networks? TensorFlow is an open-source machine learning framework developed by Google. It’s popular for neural networks due to its flexibility, extensive documentation, and strong community support. TensorFlow allows users to build and train various types of neural networks efficiently.
Q2. How do I set up TensorFlow on my computer? To set up TensorFlow, create an isolated Python environment using venv or conda. Then, install TensorFlow using pip. For GPU support, ensure you have compatible NVIDIA drivers. Alternatively, you can use Google Colab, which provides a cloud-based environment with free GPU resources.
Q3. What’s a good starting project for learning TensorFlow? A great starting project is building a neural network to classify handwritten digits using the MNIST dataset. This project allows you to learn the basics of data preprocessing, model creation, compilation, training, and evaluation while achieving high accuracy (around 98%) relatively quickly.
Q4. How can I improve my TensorFlow models? To improve your models, use techniques like BatchNormalization and Dropout to prevent overfitting. Visualize your training progress with TensorBoard to track metrics and diagnose issues. Experiment with different architectures, hyperparameters, and regularization techniques to optimize performance.
Q5. Can I save and reuse my TensorFlow models? Yes, TensorFlow allows you to save and reuse models easily. The recommended format is .keras, which preserves the model architecture, weights, compilation information, and optimizer state. You can save a model using model.save(“my_model.keras”) and load it later with keras.models.load_model(“my_model.keras”).
References
[1] – https://apxml.com/courses/getting-started-with-tensorflow/chapter-1-tensorflow-fundamentals-setup/setting-up-environment
[2] – https://www.tensorflow.org/guide/keras
[3] – https://pyimagesearch.com/2019/10/21/keras-vs-tf-keras-whats-the-difference-in-tensorflow-2-0/
[4] – https://www.projectpro.io/article/best-python-ide-for-data-science-and-machine-learning/812
[5] – https://www.tensorflow.org/tutorials/quickstart/beginner
[6] – https://www.geeksforgeeks.org/how-to-visualize-training-progress-in-tensorflow/
[7] – https://www.tensorflow.org/api_docs/python/tf/keras/layers/BatchNormalization
[8] – https://learnopencv.com/batch-normalization-and-dropout-as-regularizers/
[9] – https://www.tensorflow.org/tutorials/keras/save_and_load
[10] – https://www.tensorflow.org/guide/keras/serialization_and_saving